Friday, August 31, 2012

T-Shirt Onesie - J3133

One of my friends made an adorable onesie for her granddaughter to wear to a fair - the onesie was made from a t-shirt purchased at the same fair in a prior year. It was sooooo adorable! It gave me the idea to try it using a t-shirt from my son-in-law's police department. My daughter "stole" the shirt from his dresser. But before I cut into it, I figured I would do a muslin using a t-shirt that I didn't care as much about. I found this old Harley Davidson t-shirt that I never wear and figured it would work.

So here is the before....

Front
Back


And the after (still need snaps):


Front
Back


Monday, August 27, 2012

Raglan T - McCalls 6288

8/30/12 Edited to add final photo. I LOVE this pattern. I think I will raise the neckline in the front another 1/2" or so next time I make it so it is more appropriate for work.


How cute is this fabric?!! The French theme includes images of the Arc de Triomphe, the Eiffel Tower and a lovely french dame. I wanted to highlight the fabric in a simple t-shirt.
I love raglan sleeve shirts. I think that love stems back to the "baseball shirts" that were popular in the mid 70s. Remember this look? I had a few of them in middle school and thought I was ALL THAT when I wore them. How goofy. LOL

There don't seem to be too many patterns out there with this sleeve style, so when I saw a review last year for such a shirt, I looked up the pattern, McCalls 6288. I must admit I never would have noticed this pattern - the collection looks quite boring - but the t-shirt pattern is exactly what I was looking for.
 
There were a couple reviews at PR and I'm very thankful for the one that recommended raising the neckline and bringing in the shoulder edge (so bra straps don't show). I added an inch and you can see, it's still fairly low cut. I'm happy with the shoulders but I think I will raise the neckline a smidge more next time I make it. The top is not quite finished, still needs the neckline binding and a hem, but I am very happy with how it is turning out and will wear it with my red skinny jeans or maybe a red skirt as Sherril suggested!

Other Details:
Fabric is an ITY-type knit purchased from Spandex House in NY in May.
I cut a straight size 10. After basting, I decided it was a little too snug at the hips so I reduce the seam allowance from the waist to the hips to add an extra inch ( 1/2" on each side).

This pattern (as tweaked) will become a Tried and True for me.

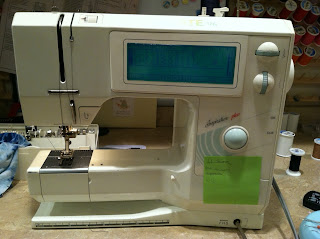
My Sewing Machine Inventory


The chronology (I'm journaling this for my own benefit):

  • 1990/1991 - purchased my first Bernina - the1020, a mechanical workhorse. It has never had a single thing wrong with it and it runs as well today as it did 20 years ago. I think I paid about $1000.    
         
  • 1992 - purchased a Bernette Bernina serger in 1992 when I moved to Cincinnati. I think it was around $500. This entry level machine has also been very reliable.
  • 2011 - purchased a Bernina 1300 MDC serger; My sewing machine dealer was offering great deals during the International Quilt Festival and I purchased for $1099. I still need to figure out how to use all the features!                                                         
  • 2011 - purchased a used Bernina 1630 from a seller on Pattern Review for $500.  I decided I wanted a second machine to bring to Florida but after I received it, I decided to keep it in Cincinnati.
    
  • 2012 - Was happy to find a used Activa 125 S on Craigslist within 60 miles of Bonita Springs. Purchased for $400.

  • 2013 - Purchased a brand new Bernina 635 for $2700 (retail price $4600!!)  
  • 2013 - Purchased a  used Babylock Coverstick for $745 including shipping (retail $1300 new)

So much more fun to collect sewing machines than say.... coins... or baseball cards..... Dontcha think?

Wednesday, August 22, 2012

Quilt Progress

Taking a little mid afternoon work break to post progress on my grandson's (boy does THAT sound weird - "grandson") quilt. After finishing the four-patch squares, I've moved on to the appliques. I started with the police badge squares. It's my least favorite of the three applique designs so I figured I would work out all my rusty applique skills on it. I'm happy with how it turned out even though I still don't love the design. Looks too much like a grinning badge to me but I couldn't figure out another design while keeping the lines simple. I finished both of them yesterday morning.


Next up are the car and hat designs. They are cut and wonder-undered and ready to be appliqued. I adore the hat and think it looks so much cuter in person. The striped fabric appears to be purple but it isn't. Blame it on the iPhone photo taken in artificial basement light. 

Wednesday, August 15, 2012

Do I remember how to quilt?

My daughter and husband are expecting a baby boy in December and have decided on a policeman theme for the baby's room in honor of his daddy. What a cute idea, right? We must be the only ones that think that because there is no bedding or baby items with a police theme anywhere. Fireman, yes. But no police. "No worries, darling daughter, I can sew." It slipped out before I could help myself.  You sewers know how that happens! I love quilts and have made a few but the last one was 18 years ago in anticipation of my youngest child. Ay yi yi!

How hard can it be, right? Well, it turns out there are no quilt / applique designs in that theme either. So, I had to completely start from scratch.  After looking at quilt designs that she liked, we decided on a mix of applique and simple four-patch squares for the quilt top. For the appliques, I found a very cute car design in "Quilts, Bibs, Blankies... Oh My" (adorable designs!!)
   
but no luck finding anything else police related (except for handcuffs and guns but we thought that might not be too child friendly!) I found a couple coloring book pages that I used to create templates for a police hat and shield.
 
I practiced with some scrap fabric until we came up with the final templates for the appliques.

I drafted the design (hee hee, that sounds so official for the chicken scratch shown below, doesn't it), calculated the measurements and converted to fabric quantities.


Next came picking the fabric. Turns out my daughter is quite picky when it comes to the colors she wants. She said blues and greens but that's not really what she meant. She meant very, very, very specific shades of blues and greens. Four quilt shops, hundreds of blue and green fabrics and three hours later and we had the fabrics. Four-patch squares are done. Appliqued squares up next!